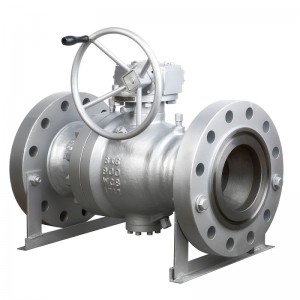
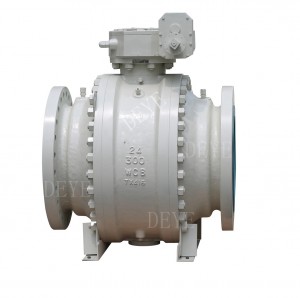
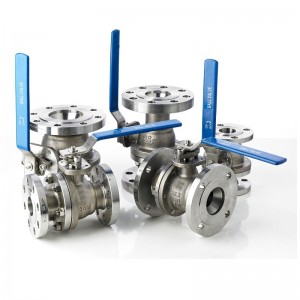
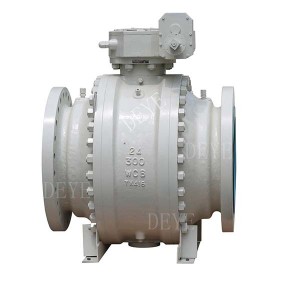
API6D vgrajen reducirni krogelni ventil
Ogljikovo jeklo A216WCBKroglični ventil, vgrajen na nastavekz reducirno izvrtino, API6D/API600
Razpon velikosti 4″-36″
Delovni tlak: 150LBS-1500LBS
Podrobnosti oblikovanja:
♦JEKLENI KROGLIČNI VENTILI API 609/API 6D
♦ANTI STATIČNO, API 608
♦ JEKLENI VENTILI, ASME B16.34
♦IZ OČI V OČI, ASME B16.10
♥KONČNE PRIROBNICE, ASME B 16.5
KONČNIKI ZA ČELJNO VARJENJE, ASME B 16.25
♦ PREGLED IN TEST, API 598/API 6D
♦ JEKLENI KROGLIČNI VENTIL ISO 14313
♦POŽARNO VARNO, API 607
Lastnosti
♦Zmanjšana zasnova izvrtine ali polne izvrtine
♦ Pokrov motorja z vijaki/deljeno telo
♦ Tip krogle, nameščene na palico ali lebdeče krogle
♦ Steblo, odporno proti izbruhom
♦ Požarno odporna konstrukcija
♦Antistatična naprava
♦ Zamašek
♦ISO 5211 Montažna podloga
♦ Konci s prirobnicami ali sočelno varjeni
♦ Na voljo za namestitev menjalnika, penumatskega aktuatorja, elek. aktuator
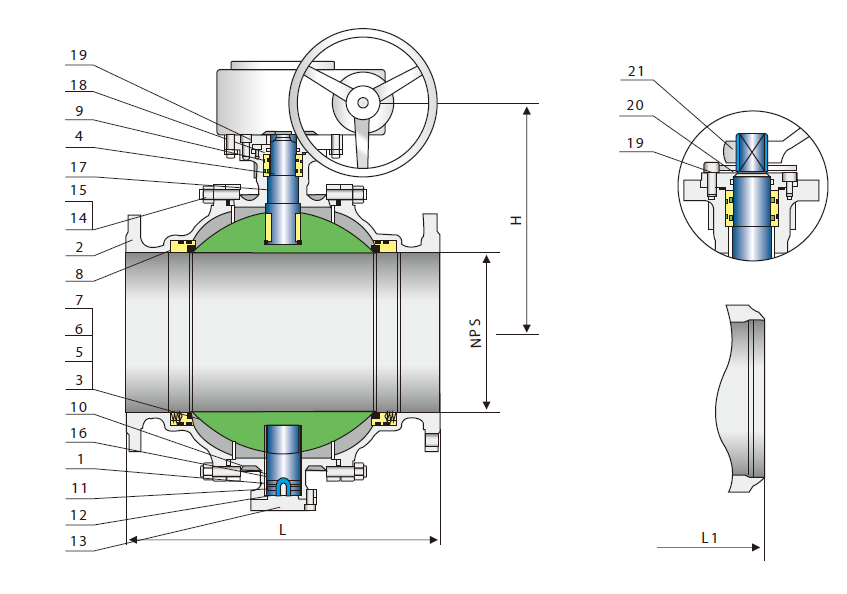
Seznam materialov glavnega dela
| št | Ime dela | Ogljikovo jeklo | Nerjaveče jeklo 18Cr- 9Ni- 2Mo | Duplex SS | Karbonsko jeklo S |
| 1 | Telo | A216- WCB | A351-CF8M | 4A/5A | A352-LCB |
| 2 | pokrov motorja | A216- WCB | A351-CF8M | 4A/5A | A352-LCB |
| 3 | Žoga | A182- F304 | A182- F316 | SAF2205/2507 | A182- F304 |
| 4 | steblo | A276-304 | A276-316 | SAF2205/2507 | A276-304 |
| 5 | Sedež | A105+ENP | A182- F316 | SAF2205/2507 | A350- LF2+ENP |
| 6 | Sedežni vložek | PTFE, polnjen s steklom | |||
| 7 | Sedežna vzmet | A313-304 | Inconel X-750 | Inconel X-750 | A313-304 |
| 8 | O-obroč sedeža | NPR | Viton | PTFE | Viton |
| 9 | O-obroč stebla | NBR 2) | Viton 2) | PTFE | Viton 2) |
| 10 | Tesnilo pokrova motorja | Grafit+304 | Grafit+316 | PTFE+2205 | Grafit+304 |
| 11 | O-obroč pokrova motorja | NBR | Viton | PTFE | Viton |
| 12 | Antistatična vzmet | A313-304 | A313-316 | SAF2205/2507 | A313-304 |
| 13 | Spodnji pokrov | A216- WCB | A182- F316 | SAF2205/2507 | A182- F304 |
| 14 | Čep za pokrov motorja | A193-B7 | A193-B8 | A193-B8 | A320-L7 |
| 15 | Zatična matica pokrova motorja | A194-2H | A194-8 | A194-8 | A194-4 |
| 16 | Držalo | A276-304 | A276-316 | A276-316 | A276-304 |
| 17 | Ležaj za palico | 304+PTFE | 316+PTFE | 316+PTFE | 304+PTFE |
| 18 | Prirobnica žleze | A216- WCB | A351-CF8M | A351-CF8M | A352-LCB |
| 19 | Vijak uvodnice | A193-B7 | A193-B8 | A193-B8 | A193-B7 |
| 20 | Stop plošča | Ogljikovo jeklo + Zn | Ogljikovo jeklo + Zn | Ogljikovo jeklo | |
| enaindvajset | Ročaj | Ogljikovo jeklo | |||
| Opomba: 1) A105+ENP izbirno | |||||
| 2) Spiralna navita konstrukcija. | |||||
1. Podaljšana ročica za enostavno upravljanje je na voljo tudi z menjalnikom, motornimi aktuatorji, pnevmatskimi ali hidravličnimi aktuatorji.
2. Razdeljen ali 3-delni, deljeno ohišje in dizajn pokrova z vijaki. To omogoča enostavno razstavljanje komponent za popravilo.
3. Polna ali zmanjšana izvrtina. Zasnova polne izvrtine zagotavlja izjemen nadzor pretoka.
4. Izbira RF prirobnic ali RTJ koncev prirobnic ali čelnih koncev za fleksibilnost cevi.
5. Standardna embalaža v primerjavi s teflonsko embalažo v kombinaciji z nakladanjem pod napetostjo ohranja stiskanje embalaže pri visokih ciklih in servisnih aplikacijah. Grafitno embalažo se uporablja pri visokih temperaturah.
6. Protistatična – med kroglo in steblom/ohišjem je vedno zagotovljen kovinski stik za razbremenitev morebitnega statičnega nabiranja med delovanjem.
7. Ognjevarna varovalka, izdelana po APl 607 ali BS 6755 za zagotavljanje delovanja
vzdržljivost v primeru požara. Sekundarno tesnilo kovina-kovina deluje kot rezerva, če primarno tesnilo uniči požar. Ventili, naročeni zaradi skladnosti z APl 607, bodo opremljeni z grafitnim tesnilom in tesnili.
1. Ventili morajo biti shranjeni v odprtem položaju. Ohraniti je treba odprtine ventilov in nazobčane površine prirobnic
zaprti z zaščitnimi pokrovi prirobnic.
2. Ventile shranjujte v dobro prezračevanem prostoru brez prahu, nizke vlažnosti, brez neposrednega stika z
tla. Če je mogoče, je treba ventile hraniti v originalni embalažni škatli. Če je treba ventile shranjevati na prostem, jih hranite v originalnem zaboju ali transportni posodi. Prepričajte se, da je embalaža ventila shranjena v dvignjenem bloku, da preprečite poškodbe zaradi vlage. Za zaščito pred prahom in dežjem je treba uporabiti zaščitno prevleko.
3. Ventili nikoli ne smejo biti zloženi drug na drugega, da bi se izognili kakršnemu koli popačenju ventila, ki lahko vpliva na
delovanje ventila in povzroči poškodbe osebja.
4. Ventile, ki so bili shranjeni dlje časa, je treba pred tem očistiti in pregledati
namestitev. Preglejte tesnilno površino, da se prepričate, da je čista in brez ostankov ali poškodb.
5. Ventila ne izpostavljajte jedkemu okolju, ker lahko povzroči poškodbe ventila
komponente.
1 Pred namestitvijo preverite imensko ploščico ventila in informacije o telesu ventila, da zagotovite, da je ventil primeren za predvideno uporabo.
2 Pred namestitvijo odstranite pokrov prirobnice in zaščitno folijo na tesnilni strani prirobnice, preglejte odprtine in tesnilno površino prirobnice, odstranite vso umazanijo s čisto mehko krpo, po potrebi uporabite protikorozijsko čistilno tekočino za čiščenje in nikoli ne uporabljajte drugi kemični izdelki.
3 Preglejte tesnilno površino tesnila prirobnice (vključno z obročnim tesnilom) in se prepričajte, da je v sprejemljivem stanju za namestitev.
4 Po čiščenju ventila in pred namestitvijo ga enkrat odprite in zaprite. Prepričajte se, da ventili tečejo gladko. Če opazite nenormalno delovanje, zaustavite delovanje in preglejte notranjost ventila glede morebitnih ovir, ki bi lahko preprečile normalno delovanje.
5 Po uspešnem ciklu in zagotavljanju pravilnega delovanja ventila vrnite ventil v odprt položaj in zagotovite, da so tesnilne površine ventila zaščitene, dokler namestitev ni končana.
6.Postavite ventil v cev ali prirobnični priključek; zagotovite, da so vse napetosti, ki jih povzroči nepravilna poravnava cevi, razbremenjene. Ventili niso namenjeni za poravnavo nepravilno nameščene cevi.
7. Ventil namestite ob upoštevanju kvalificiranih standardov in praks za cevovode. Ventili, označeni s smerjo pretoka, morajo biti nameščeni v skladu s pretokom cevi.
8. Priporočena usmeritev krogelnih ventilov je pokončna z ventilom v vodoravni liniji. Ventil se lahko namesti v drugih smereh; vendar pa lahko vsako odstopanje od priporočenega vodoravnega položaja ogrozi pravilno delovanje ventila in razveljavi garancijo.


